
To view the blog, visit sweetrosestudio
I loved how the snowflakes were offset on the wreath, not centered. So I decided that was how I wanted to create my Winter Snowflake Wreath.
So I set out to get my supplies. You will need:
Scissors
Hot Glue and Hot Glue Gun
Grapevine Wreath - I used an 18" wreath from Hobby Lobby. $4.99, and with their 40% coupon, only $2.99.
Ribbon of your choice - I purchased mine at Hobby Lobby. $3.99, but it was 40% off so it only cost $2.39.
Snowflake Ornaments - I used silver snowflakes that I purchased at Pat Catan's for $1.98. My VIP Card saved me $0.41.


I selected this particular color ribbon to match some ornaments I have to hang on an iron tree in the entry way of our home. Here are the ornaments
 So the ribbon was a perfect match.
I started by making my bow that would go on the top of my wreath. The type of bow that I want determines how I make it. This is honestly a fake bow and generally what I do when the ribbon is one sided.
I started by making my smallest look, which is about 4 inches long. I hot glued one end at about 1.75 inches.

Then I glued the other end down, completing my four inch ribbon loop. I also created a 5 inch, 6 inch, 7 inch & 8 inch loops.


Here you can see all the ribbon loops stacked on one another.
Next, I found the center, added hot glue and glued the ribbon loops together.

In the center of the top loop, I added hot glue to add the center piece that holds all the parts of the bow together.


I attached the piece to the back with hot glue.


Next step, attach the tails to the bow with hot glue.


I snipped the tails so they would fray, you can leave them straight, cut on an angle, whatever floats your boat!
Next, onto the wreath.

If your snowflakes are actual ornaments, snip off the hanger.
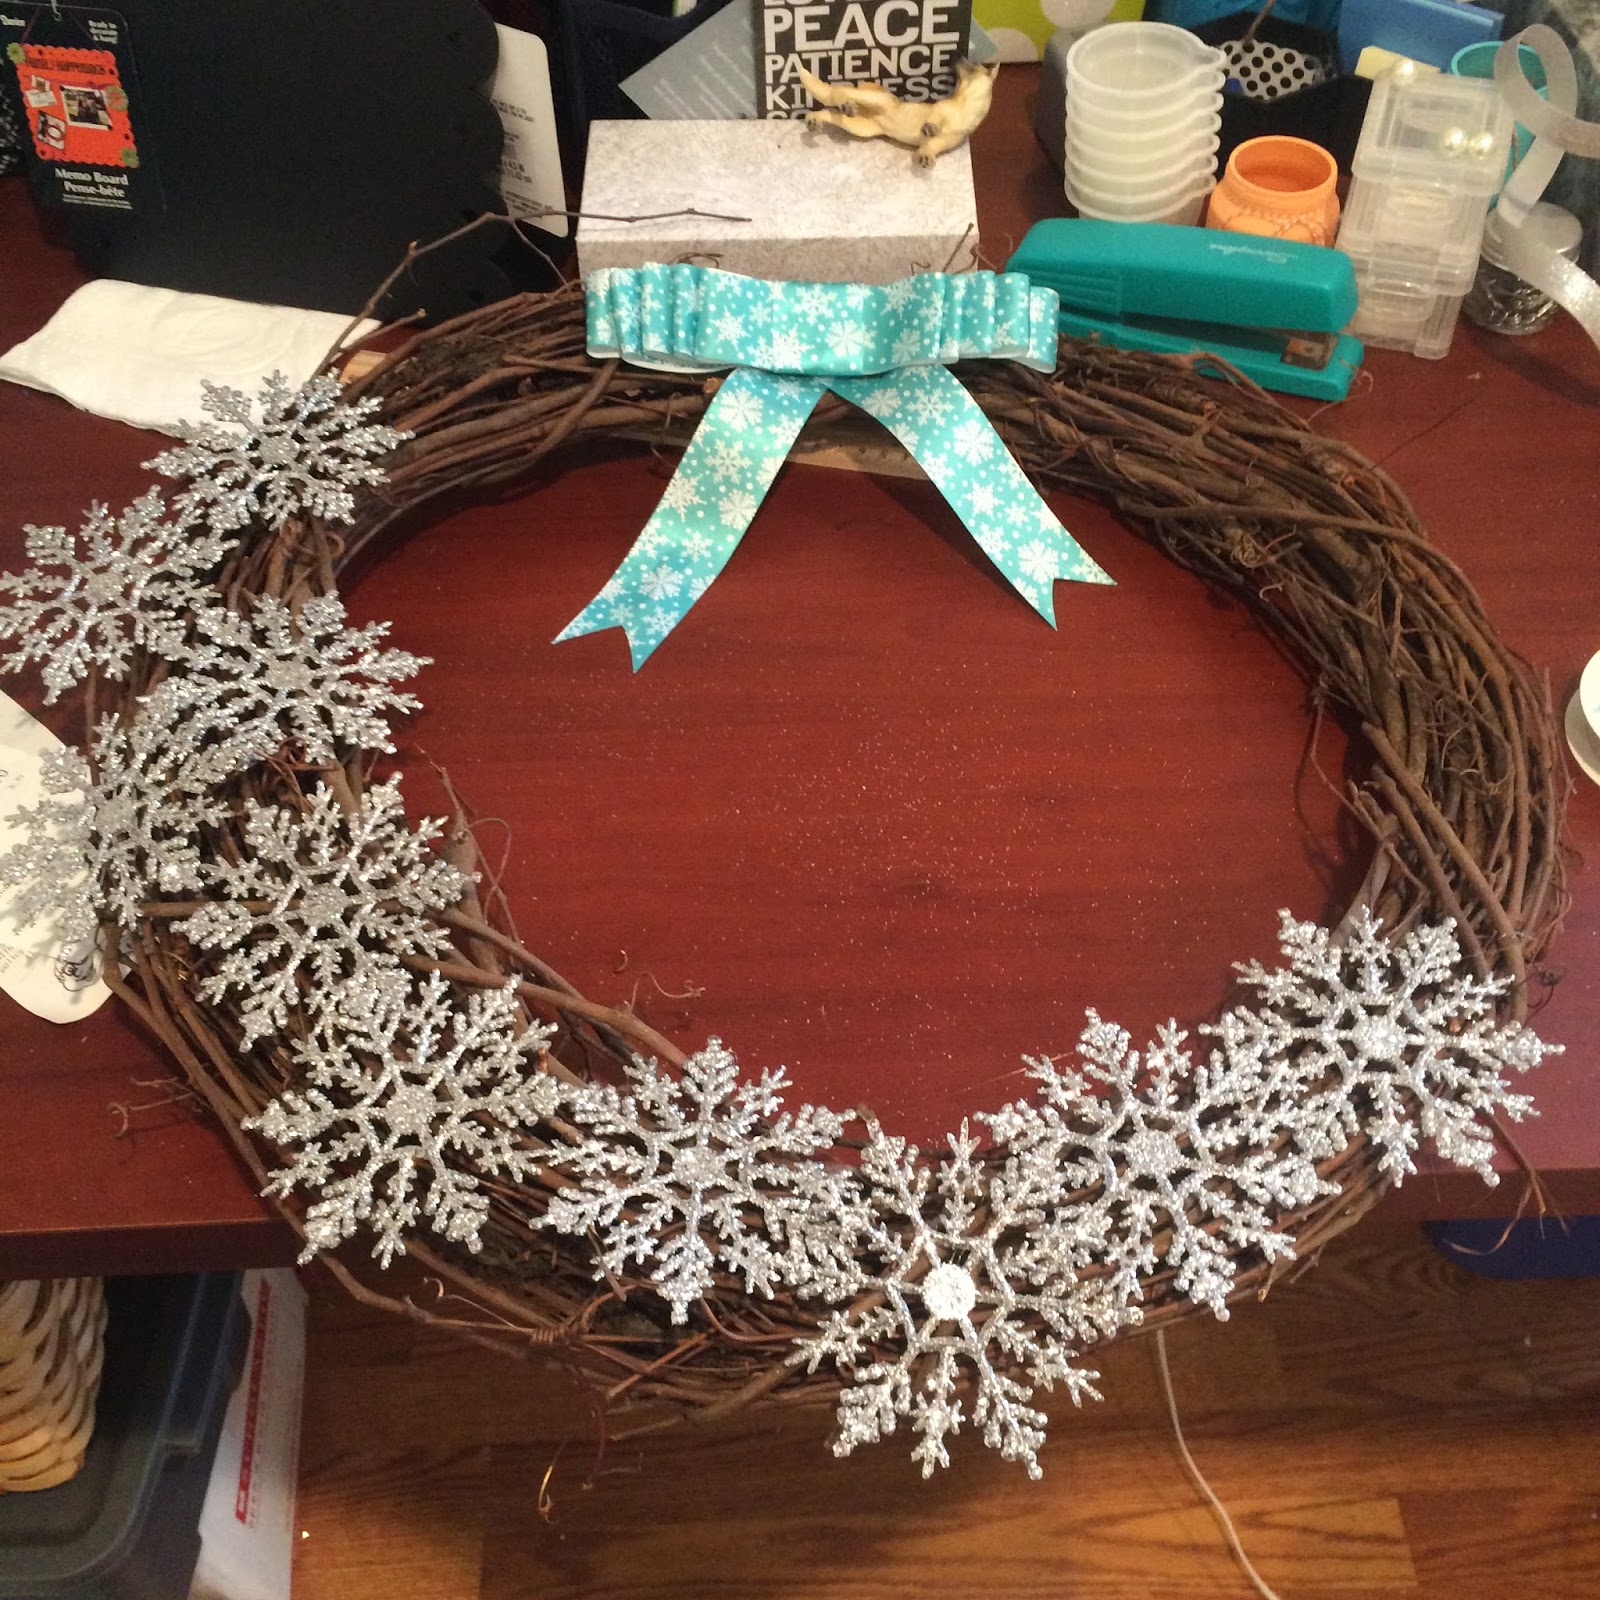
Then lay out your bow and snowflakes, play around with it until you find exactly what you are looking for.
Once you have it determined, use your hot glue gun to attach the snowflakes and bow.
After that, I added some jute to use to hang it. You can use the ribbon to match, whichever you prefer.

I tired the jute to one of the pieces that "held" all the grapevine together.

Here is the wreath as it stands. I did fluff the bow out a little more, and I think it needs some berries. So I am going to keep my eyes peeled for some white berries to add the wreath, and I think I'll sprinkle them throughout the entire wreath.
So that's how I created my Winter Snowflake Wreath!
No comments:
Post a Comment