Crafts by Amanda had an adorable Button Tree. Visit http://craftsbyamanda.com/vibrant-button-tree-on-canvas-a-giveaway/ to see the original post.
I fell in love with the idea of a button tree! So I set out to make one myself! :)
.jpg)
Supplies :
Canvas (I used an 11x14 - I got a 2 pack from Hobby Lobby for $3.59 by using at 40% off coupon)
Buttons (I purchases two tubs from Pat Catan's for $2.99 each)
Acrylic Paint (2 bottles - one for the background color, and one for the tree trunk - I got them for $.54 a piece when they were on sale at Hobby Lobby)
Aleene's Tacky Glue (I had it on hand from previous projects, but its available at most craft stores)
Foam Brush
Thin Paint Brush
Brown 3-D Paint (I found some fabric paint on clearance, but I assume puffy paint would work as well)

Begin by painting your canvas, I always start on the back so I can be sure I like the color, and know how many coats I will need to get an even coverage

I ended up doing two coats, after they have dried I flipped it over and painted the front (two coats)

Once the paint had completely dried, I began by drawing a tree trunk onto the canvas with a pencil.

After I was satisfied with the outline of the trunk, I began painting it with the brown acrylic paint. I used a very thin paintbrush to outline and paint the tree.

I went back over light areas to be sure that I had even coverage, but then as I looked at it, I thought about the fact that trees are not necessarily the same color, so differing tones were okay.

I then went back and added thin branches to the tree.

I continued to add branches until I felt like I had the fullness I wanted.

Let the tree entirely dry. Mine dried over several days.

On a scrap piece of paper, test out your fabric/puffy paint to see how fast/thick it comes out before you try it on the canvas and ruin all your hard work.

Begin by adding thin lines creating the bark of the tree. I added it all over the tree, on both the trunk and the branches.

Time to add buttons!
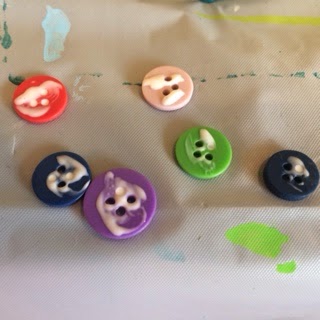
I found it was easiest to paint the glue onto the back of the buttons so that I did not have too much glue oozing out onto the canvas.

Place buttons around the branches to give the tree its leaves.

Continue to add buttons, make sure you are using a variety of colors/sizes to evenly disperse them throughout.

Continue to add buttons until you are happy with the look of your tree!

Now you have an adorable button tree on your hands! Find the perfect place to hang it up and enjoy!
Happy DIY-ing!
No comments:
Post a Comment