Sunday, December 27, 2015

Sliced Wood Wreaths

I love the look of sliced wood wreaths. It all started when I created two wood sliced hearts to use at my wedding. Now they hang in my house. So I set out to make the perfect wreath. But I had two ideas and I couldn't settle between them. So I decided to do both!

Supplies
Wire wreath form
Wood slices
Burlap
Ribbon/burlap of choice for bow
Hot glue and hot glue gun
Scissors
Sticks
Pinecones


I started out by wrapping the wire wreath form with burlap as the wood sliced don't cover the wire entirely, and I'd rather see burlap than green wire. 
I started by hot gluing it in one spot to start and continued wrapping around until the entire wreath form was covered and the wire was not able to be seen. 
To attach the tail, I glued onto the bag, and used extra glue to be sure that it wouldn't fray. 
As you can see, I ran an extra thick strip of hot glue along the edge on the back of the wreath. 

Next, I began hot gluing the wood slices on. Make sure you get a good layer of hot glue to attach it. Push down for 30 seconds to secure it to the form. 
I ended up making two different wreaths using the frames and slices of wood. 

The first wreath: I used two rows of the wood slices and burned welcome onto the top layer using my wood burning tool. 
I then added a burlap bow, some twigs and some pinecones giving it a very rustic look. 
After hanging up the wreath, I decided it need a little something else, so while doing some after Christmas shopping, I found this cute E and decided to add it to the wreath. Just enough fancy to balance the rustic :)


For the second wreath, I opted to use left over items from our wedding. So I incorporated a blue chevron burlap bow from some left over scraps I had..
However, to be honest, it needs something else. Just not sure what will be perfect. So for now, it hangs like this, and I'll ponder for awhile until I come up with the perfect solution. 


Saturday, October 31, 2015

Winter Snowflake Wreath

Since we've moved into our own home, I've really been DIY-ing as many decorations for our house as I could! I wanted to create a wreath for our front door that would be perfect for winter (meaning after Christmas), as I already have several that would be perfect for Christmas. So, I settled on using a Grapevine Wreath, and incorporating snowflakes. But beyond that, I wasn't sure what to do. So as I was browsing Pinterest, I saw this beautiful wreath from Sweet Rose Studio.

To view the blog, visit sweetrosestudio
I loved how the snowflakes were offset on the wreath, not centered. So I decided that was how I wanted to create my Winter Snowflake Wreath. 

So I set out to get my supplies. You will need:
Scissors
Hot Glue and Hot Glue Gun
Grapevine Wreath - I used an 18" wreath from Hobby Lobby. $4.99, and with their 40% coupon, only $2.99.
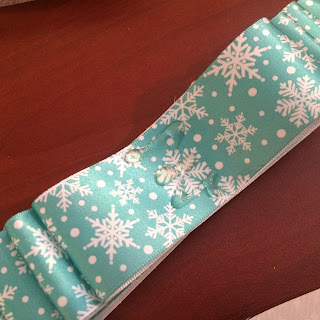
Ribbon of your choice - I purchased mine at Hobby Lobby. $3.99, but it was 40% off so it only cost $2.39.
Snowflake Ornaments - I used silver snowflakes that I purchased at Pat Catan's for $1.98. My VIP Card saved me $0.41. 


I selected this particular color ribbon to match some ornaments I have to hang on an iron tree in the entry way of our home. Here are the ornaments 


  So the ribbon was a perfect match.

I started by making my bow that would go on the top of my wreath. The type of bow that I want determines how I make it. This is honestly a fake bow and generally what I do when the ribbon is one sided. 

I started by making my smallest look, which is about 4 inches long. I hot glued one end at about 1.75 inches.

Then I glued the other end down, completing my four inch ribbon loop. I also created a 5 inch, 6 inch, 7 inch & 8 inch loops. 

Here you can see all the ribbon loops stacked on one another.

Next, I found the center, added hot glue and glued the ribbon loops together. 
In the center of the top loop, I added hot glue to add the center piece that holds all the parts of the bow together. 

 I attached the piece to the back with hot glue.


 Next step, attach the tails to the bow with hot glue. 

I snipped the tails so they would fray, you can leave them straight, cut on an angle, whatever floats your boat!

Next, onto the wreath.
If your snowflakes are actual ornaments, snip off the hanger.

Then lay out your bow and snowflakes, play around with it until you find exactly what you are looking for. 


Once you have it determined, use your hot glue gun to attach the snowflakes and bow. 


After that, I added some jute to use to hang it. You can use the ribbon to match, whichever you prefer. 
I tired the jute to one of the pieces that "held" all the grapevine together. 


Here is the wreath as it stands. I did fluff the bow out a little more, and I think it needs some berries. So I am going to keep my eyes peeled for some white berries to add the wreath, and I think I'll sprinkle them throughout the entire wreath.


So that's how I created my Winter Snowflake Wreath! 

Christmas Wreath

In September, I received an email that the  Overstocks Crafts 2000 store near my home was having a sale, 75% off the lowest ticketed price. That was absolute music to my crafty ears. I headed I've after work and started filling up a cart (literally). And as I was going up and down each aisle, I heard some of the cashiers telling customers that the store was closing and would be there until all was gone. To be honest, I was a little heart broken, anytime I needed anything craft wise, I always hit up the Overstocks Crafts 2000 store first. Anyways. I got a lot of good crafty stuff, and I saved even more, and headed on my merry way home. But when I got home, I felt like I'd missed out on some great craft-ortinities. So, I headed back and scored the perfect supplies to create a wonderfully wintery wreath.

Here is the finished wreath

So I found the wreath in with all the Christmas decor. It is a 16 wire wreath that is wrapped in grape vine, then wrapped in "snow" and sprinkled with glitter. Honestly it was the perfect find. As I continued to browse the aisles (the second time), and came across some 4 inch gold snowflake ornaments, and right next to them were 6.5 inch gold snowflake ornaments. I began thinking about the potential of the wreath, and put the snowflakes in the cart. I liked the idea of the silver contrast on the snow to the gold contrast of the snowflakes (normally I'm not a big gold person). But, I knew the wreath would need something more than just snowflakes, so I continued looking to see what I could find. I happened upon some red holly berries. I thought they would add a pop of color among the neutral tones of the wreath I was imagining in my head. Then I set out in search of some thin gold ribbon to use as a hanger for the ribbon, once I found that (and some other goodies), I headed to the check out.

So all in all, here are my supplies. 
I also used hot glue and a hot glue gun, scissors, and wire cutters. 

I started by laying out the wreath and placing the snowflakes and berries. I tried two different placements and settled on the second as it felt lighter to me. 
Try number 1. 
And the winner. 

Before I glued the snowflakes, I snipped of the strings to hang them on a tree. 

I started by gluing the snowflakes on. 
I did a large dot of hot glue in the center of the snowflake and then added glue to the wreath in spots where the snowflake touched to be sure it was secure. 

As you ca. See I used five of the 2 inch snowflakes and one large 4 inch snowflake at the top. 

I decided to use some of the leaves from the holly berries to give a little more color to the wreath. I clipped off the wire, right at the base of the leaf (and the berries too) with wire cutters and then began glueing them in.

Once all snowflakes, leaves and berries were secured, I moved onto the ribbon hanger. I threaded the ribbon around the wire frame, not the grapevine. Then I put a hefty amount of hot glue on the ribbon. 

Then glue the ribbon end to the rest of the ribbon, and I lined the edges up so it looked seamless. 


And ta- da, there you have a beautiful winter wreath!


Like I said before, I was able to get all the supplies at the Overstocks Crafts 2000 store at 75% off the lowest prices. So I was able to create this wreath for a great price, unless you have this awesome opportunity near you, I would suggest looking for these items, or similar items to make it your own after Christmas when stores are offering huge savings on Christmas items.

I scored the 16 inch snow/grapevine wreath for $2.18
A package of 5 6.5 inch Gold Glittered Snowflakes for $.35
A package of 10 4 inch Gold Glittered Snowflakes for  $.35
Two bunches of holly berries for $.24 each
And a 5 yard roll of 3/8 inch gold ribbon for $.26

So all in, for my wreath, $3.62!

Definitely sad that Overstocks Crafts 2000 is closing, but super excited to be able to do so many crafts and not feel like I broke the bank!
Thrifty, crafty and cute, that's the way I like it! :)


Monday, August 17, 2015

Acrylic Painted Date Night Jar/Dollar Dance Jars

My best friend is getting married this fall, so for her bridal shower, we did a Date Night Jar. I decided to paint them in her wedding colors..
Trip after trip after trip to craft store after craft store, I realized that I would just have to mix paints to get the perfect color to match her wedding colors. 

So that is what I did. I mixed purples and greys, browns and blacks to make the perfect shade of plum.
And I mixed green and green, with some grey, brown, black and white to get the perfect shade of clover.

Truthfully, it wasn't that simple, it was a long slow process, but I didn't mind, because she deserves the best!! :) 

And I can't tell you how accomplished I felt after getting the colors just right!!! :)

Any who, 

You will need:

Mason Jar (or the spaghetti sauce jar you just emptied will work too!)
Paint - find a color you like, or mix your own
Paint brush (es)
Acrylic Sealer
Tagboard Tags
Sharpie
Jute or Ribbon

Step 1: Paint the bottom of the jar - I found this to be the best place to start after we painted over 40 mason jars for my wedding. 

You will want to let it dry and go back and do a second coat on it, this will prevent any light spots in the paint. Unless that is the look you want. 


As you can tell, at the bottom of the jar, I have already put two coats on, it is very thick and dark, and towards the middle, you can see threw it,. That party only has one coat on it. 

Continue paint the jar. Once the bottom has completely dried - I recommend waiting at least an hour or two to be sure, you can flip it over  and start painting up the jar.

When you are painting up the jar, if it has words on it, you want to be very carefully that it is covered well. 


I thought I would show you this water container. I found it at Pat Catan's for only $1.00. Totally worth the investment. It keeps my brushes from getting crusty, and saves me trips having to constantly rinse out brushes!! Nifty little one dollar investment, I'd say! 

Keep working up the jar!


Once you get to the rim, you will need to be very careful to get it well covered. I typically do three coats just to be sure!


Once the jars are completely covered and you are happy with how they look, you will want to spray them with a clear acrylic sealer. This will help to prevent scratches. Will it keep all scratches from happening? No, will it help to lessen the number??? Oh, definitely! 


Here are the jars after they have been sealed- honestly, looking at them, you really can't tell, but it the long run it will protect them!


Ta-da! Beautifully painted jars!

Here are the fabric swatches that I had purchased to be able to match things, I think they are pretty darn close, and I am very proud of myself!


Step 3: I used my Sizzix, which I use for scrapbooking, and a tag die cut that I had purchased to do baby shower favors for one of my sister-in-laws showers. 

I die cut four of them - if you do not have access to a Sizzix or Die Cut Machine, I know that Hobby Lobby has some pre-cut tags, if I remember correctly, they are in section with card making supplies!
With a silver sharpie, I wrote on the tags


These are the tags for the dollar dance!